
With this module enabled, the system provides integrated functionality between OZmap and OZmob. OZmob users can request changes directly from the field through the app, including modifications to box connections and vertical buildings. In the office, OZmap users receive these requests for review and can either approve or reject them.
Shall we explore the features?
Requesting a Change in OZmob
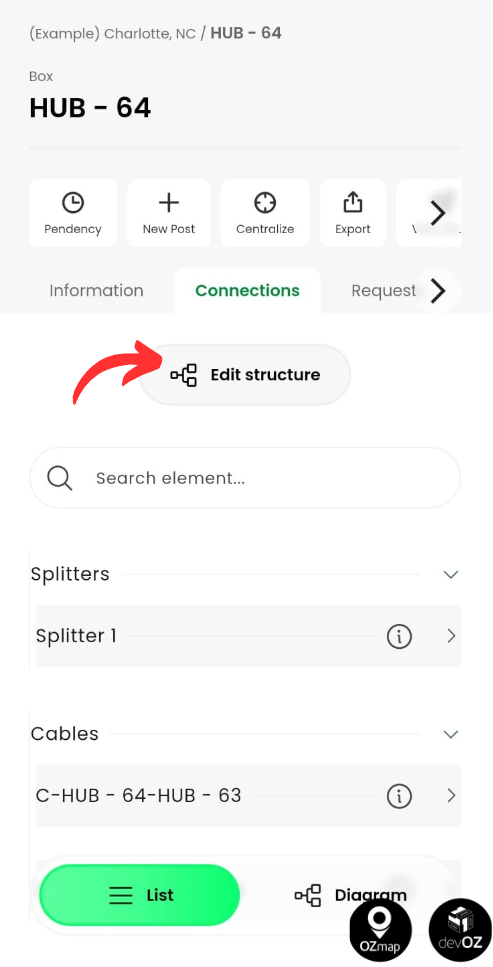
When accessing boxes with the module enabled, a highlighted Edit Structure button will be available in the Connections tab.
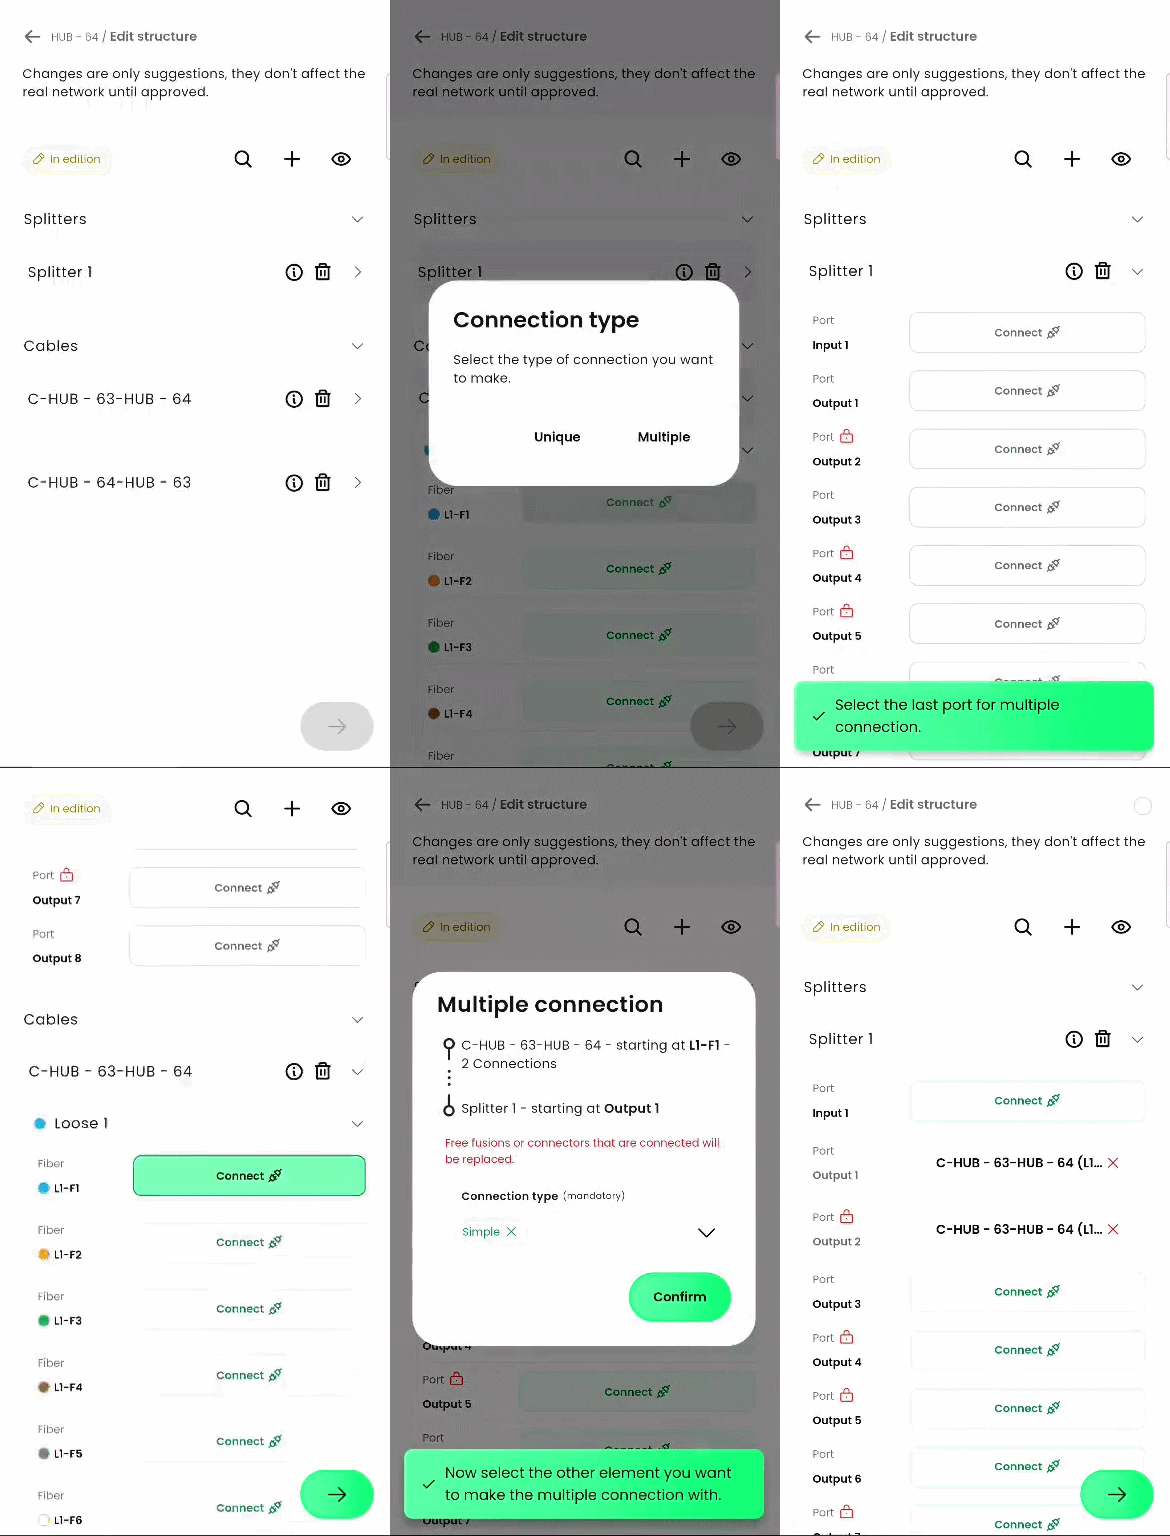
From this point on, the system enters suggestion mode. The box connection details become editable, allowing users to change ports, create new connections (single or multiple), and remove existing connections.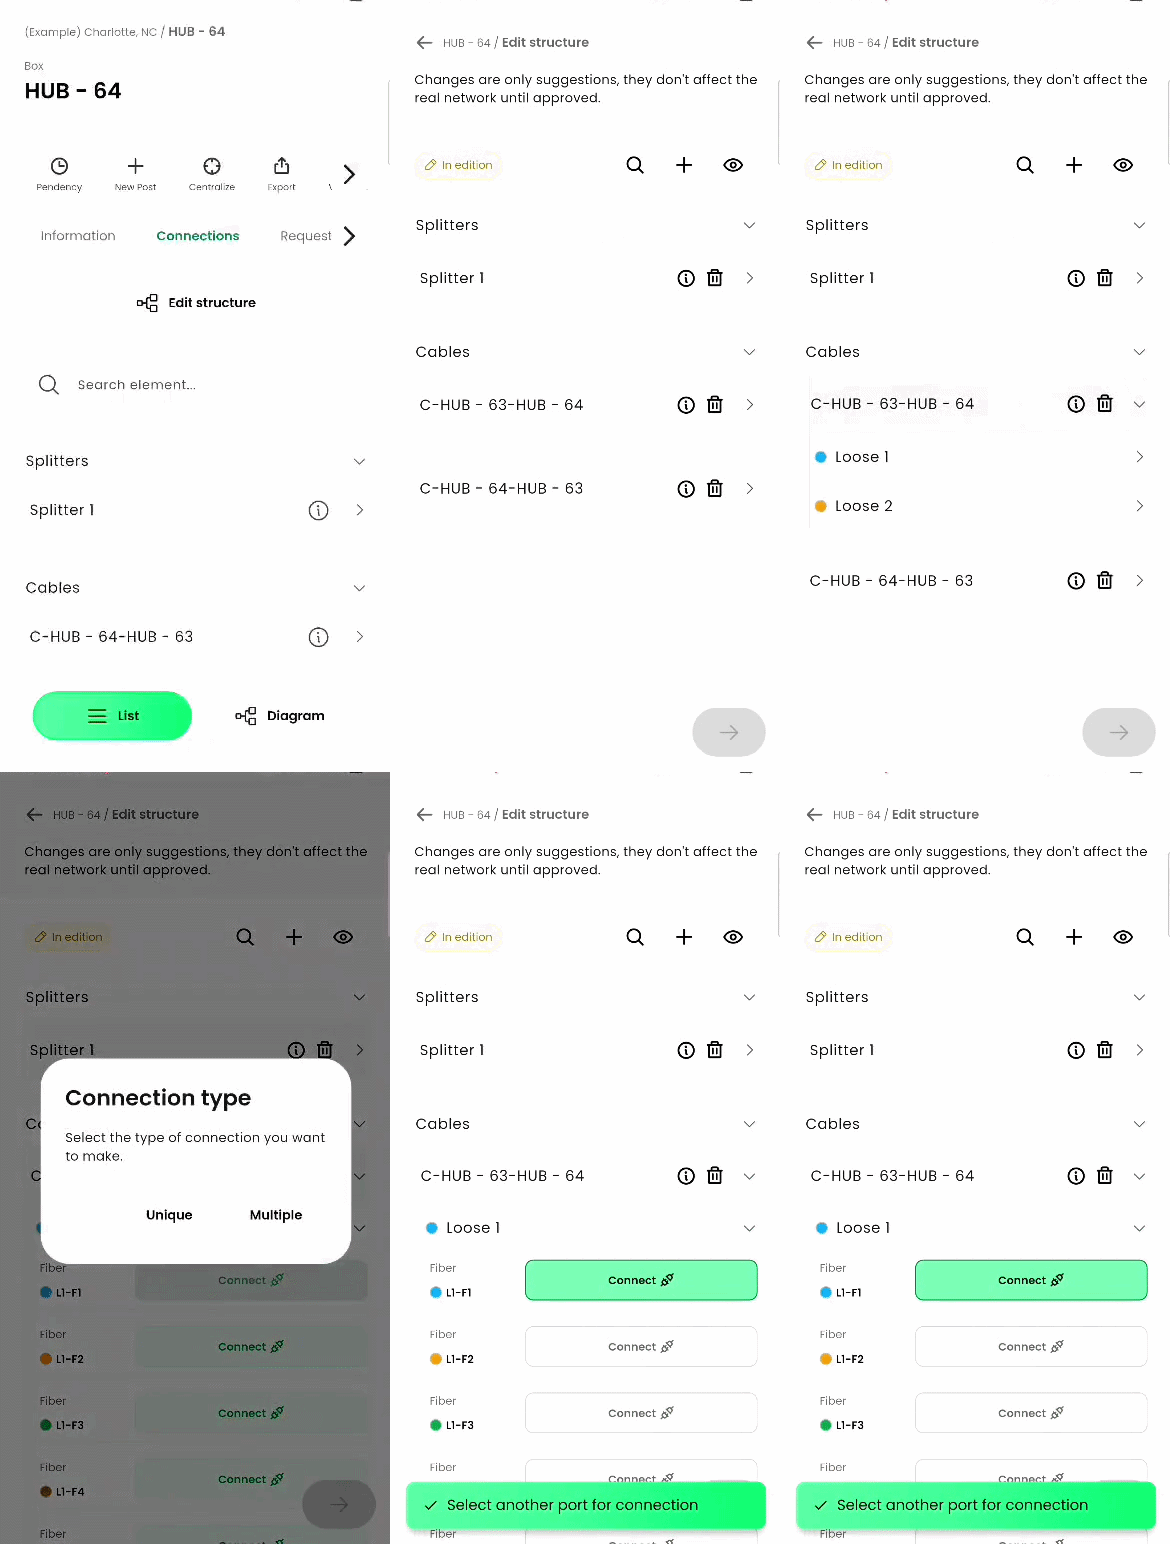
These connections can also be simple, spliced, or connectorized.
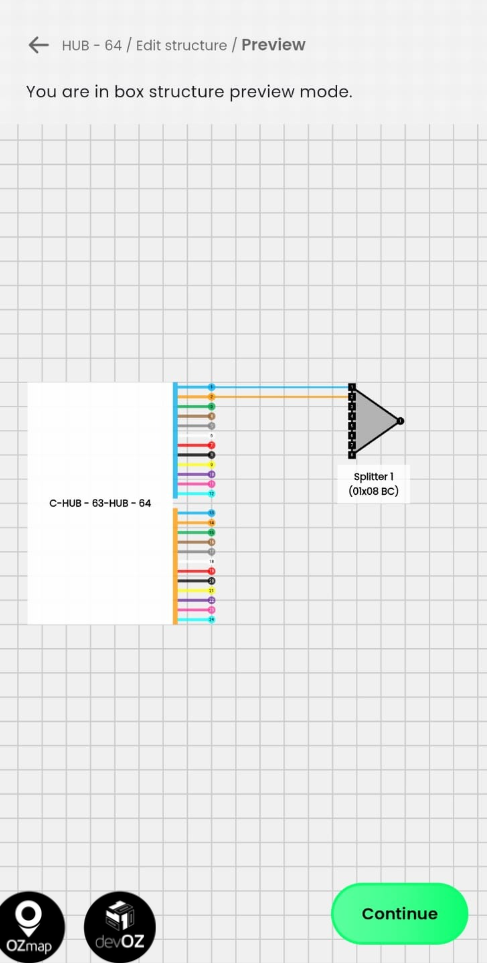
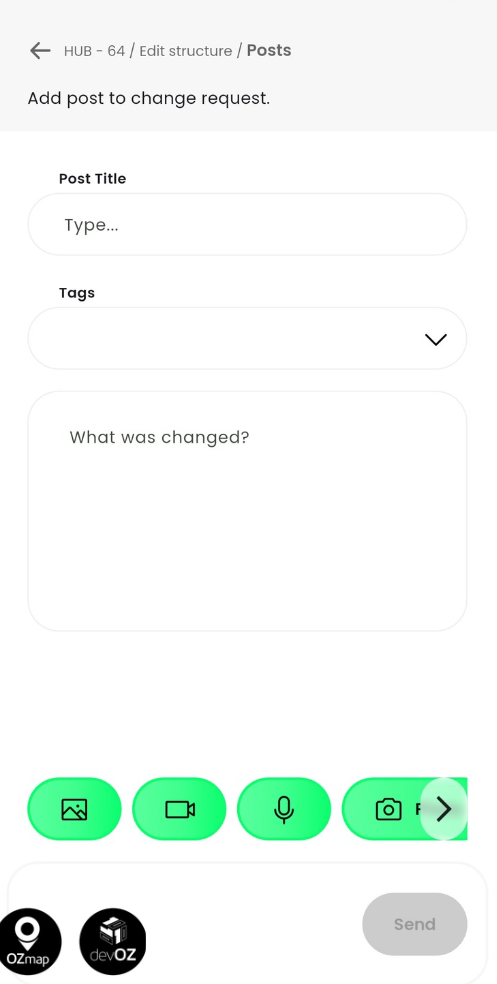
When submitting the request, the user will preview the proposed changes in the diagram. After that, they must create a post with a description of what was done.
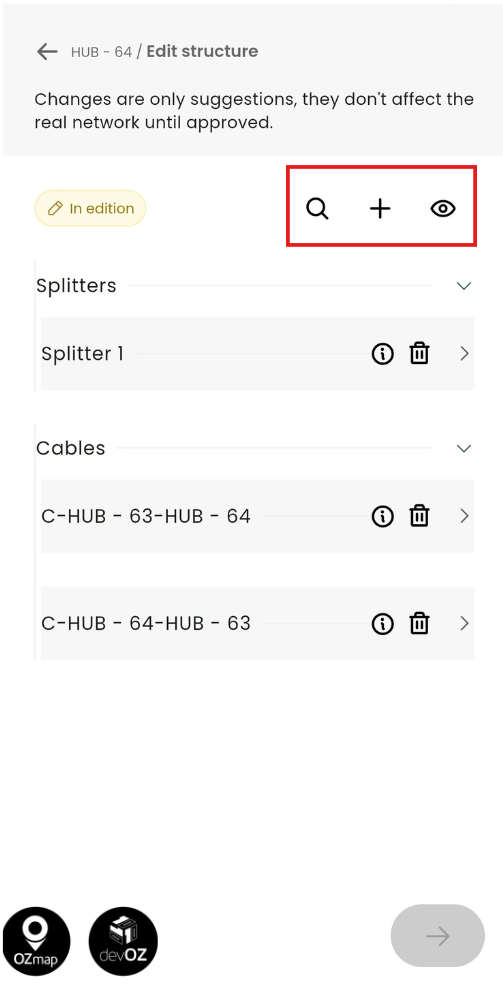
From the top buttons in the tab, users can also search for elements, add cables, splices, switches, or connectors, and view the current diagram.
Creating a Box in OZmob
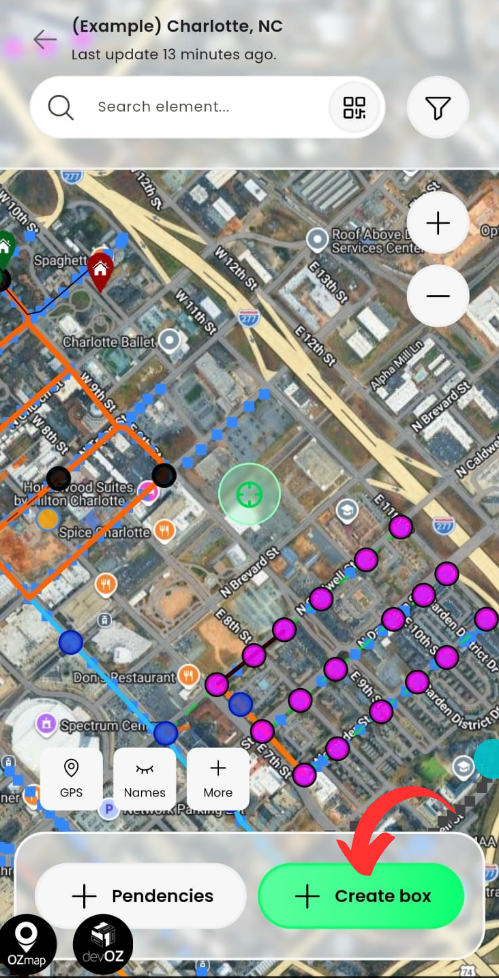
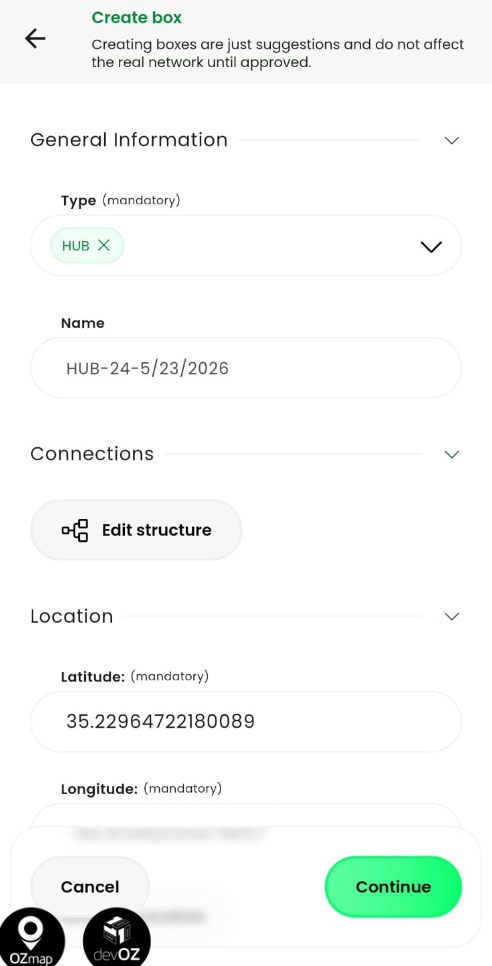
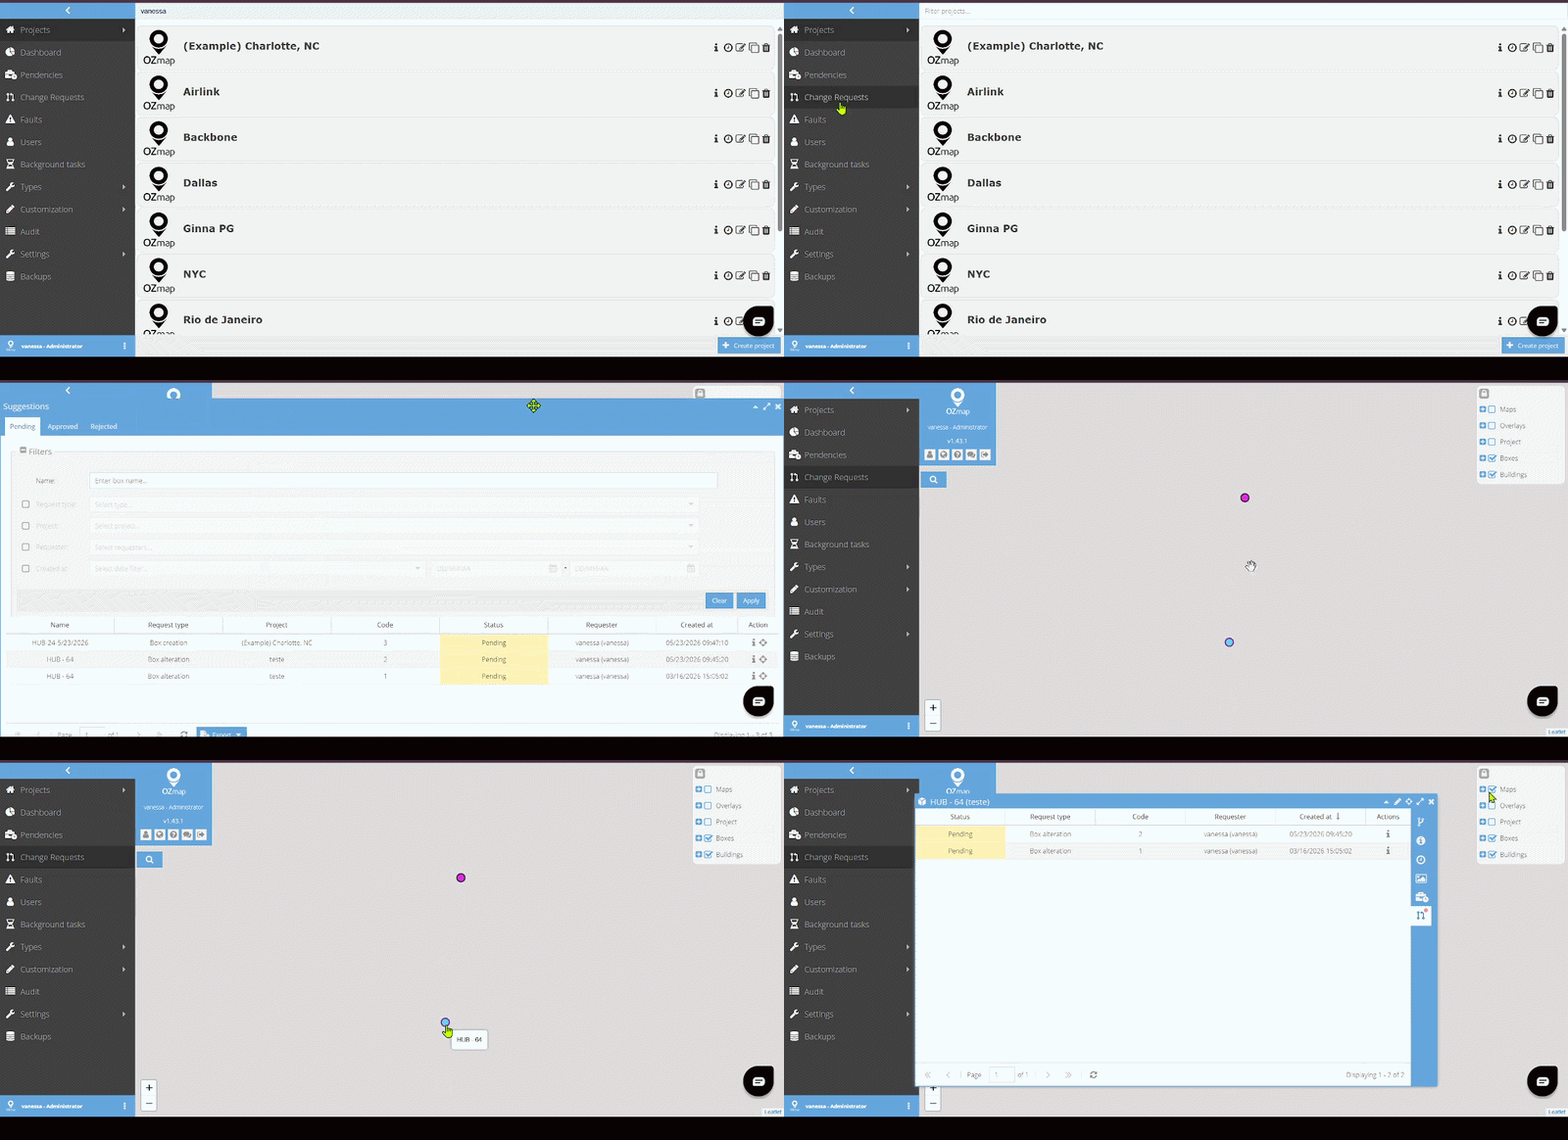
When using this module, you will also notice a Create Box button centered on the open map, next to the pending items. This allows you to quickly document a suggestion for creating a box:
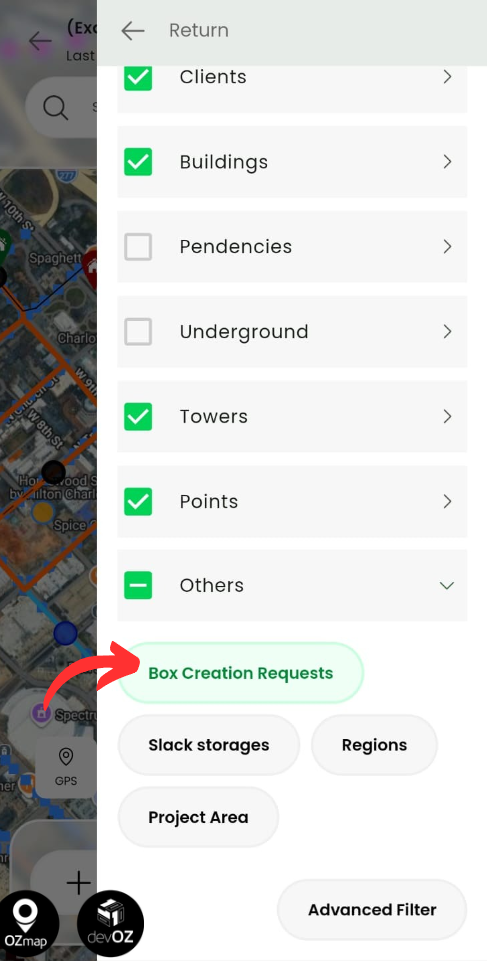
Additionally, there is a dedicated map layer that allows the technician to view box creation requests directly:
When creating a box, you can select the type, edit the name, and modify the structure before submitting the request.
Requests Tab – OZmob
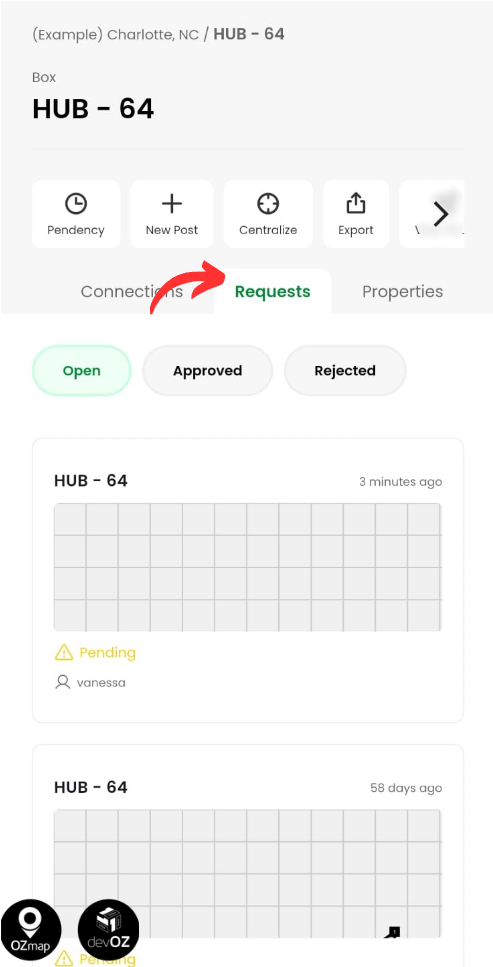
Still in OZmob, there is also a Requests section where users can check which change requests have been submitted and their current status: Open, Approved, or Rejected.
OZmap
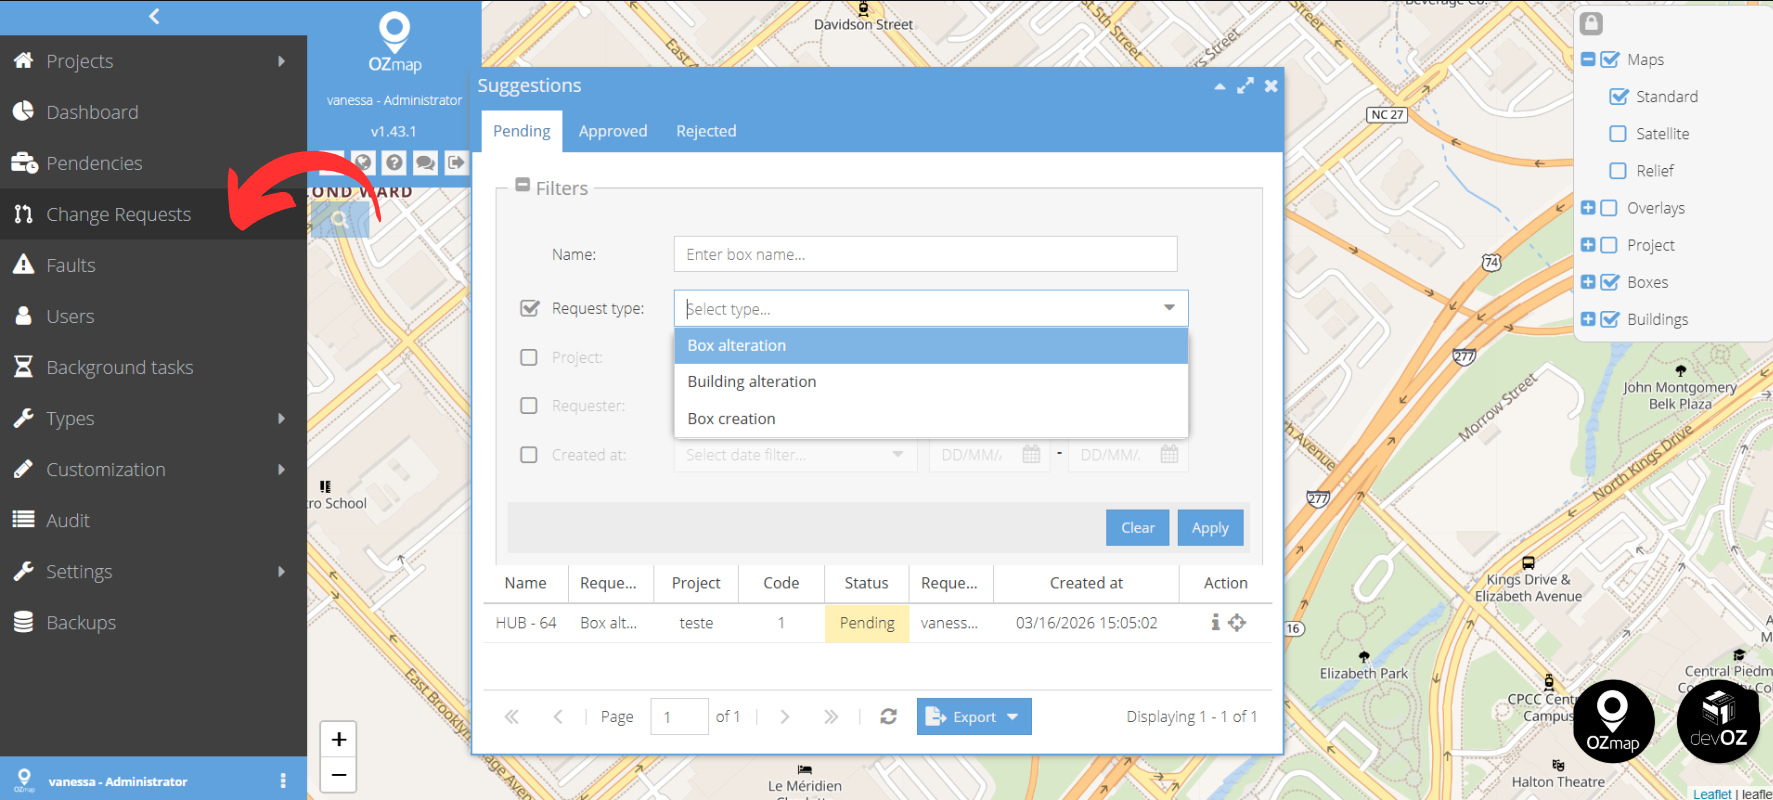
With the module enabled, OZmap will display a new tab: Change Requests.
In this tab, the map will display only the boxes and vertical buildings where a change has been requested. Additionally, an information panel will automatically appear, allowing users to apply various filters. As in OZmob, the panel is divided into Pending, Approved, and Rejected requests.
Note: The code column is unique for each request and uses the identifier configured in the project settings as a prefix to indicate which project the request belongs to.
By selecting a request, it is possible to see exactly what has been changed by comparing the current diagram with the suggested one. Additionally, the information from the post created in OZmob will be displayed on the right, where the request details are provided.
It is possible to add comments to the request, and these are mandatory if the request is rejected:
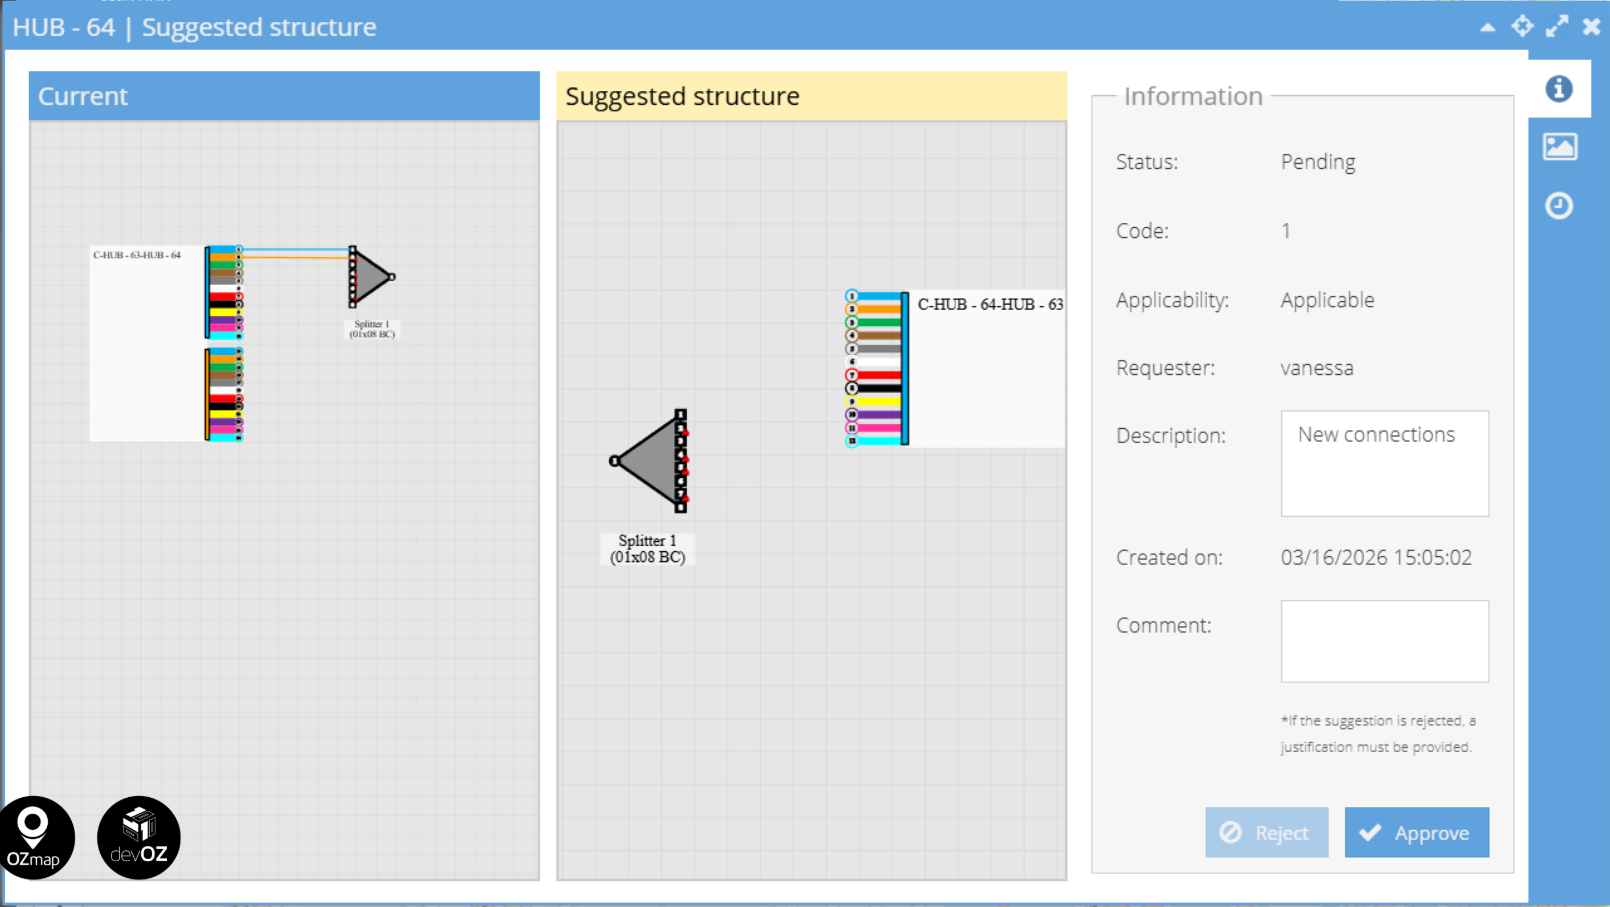
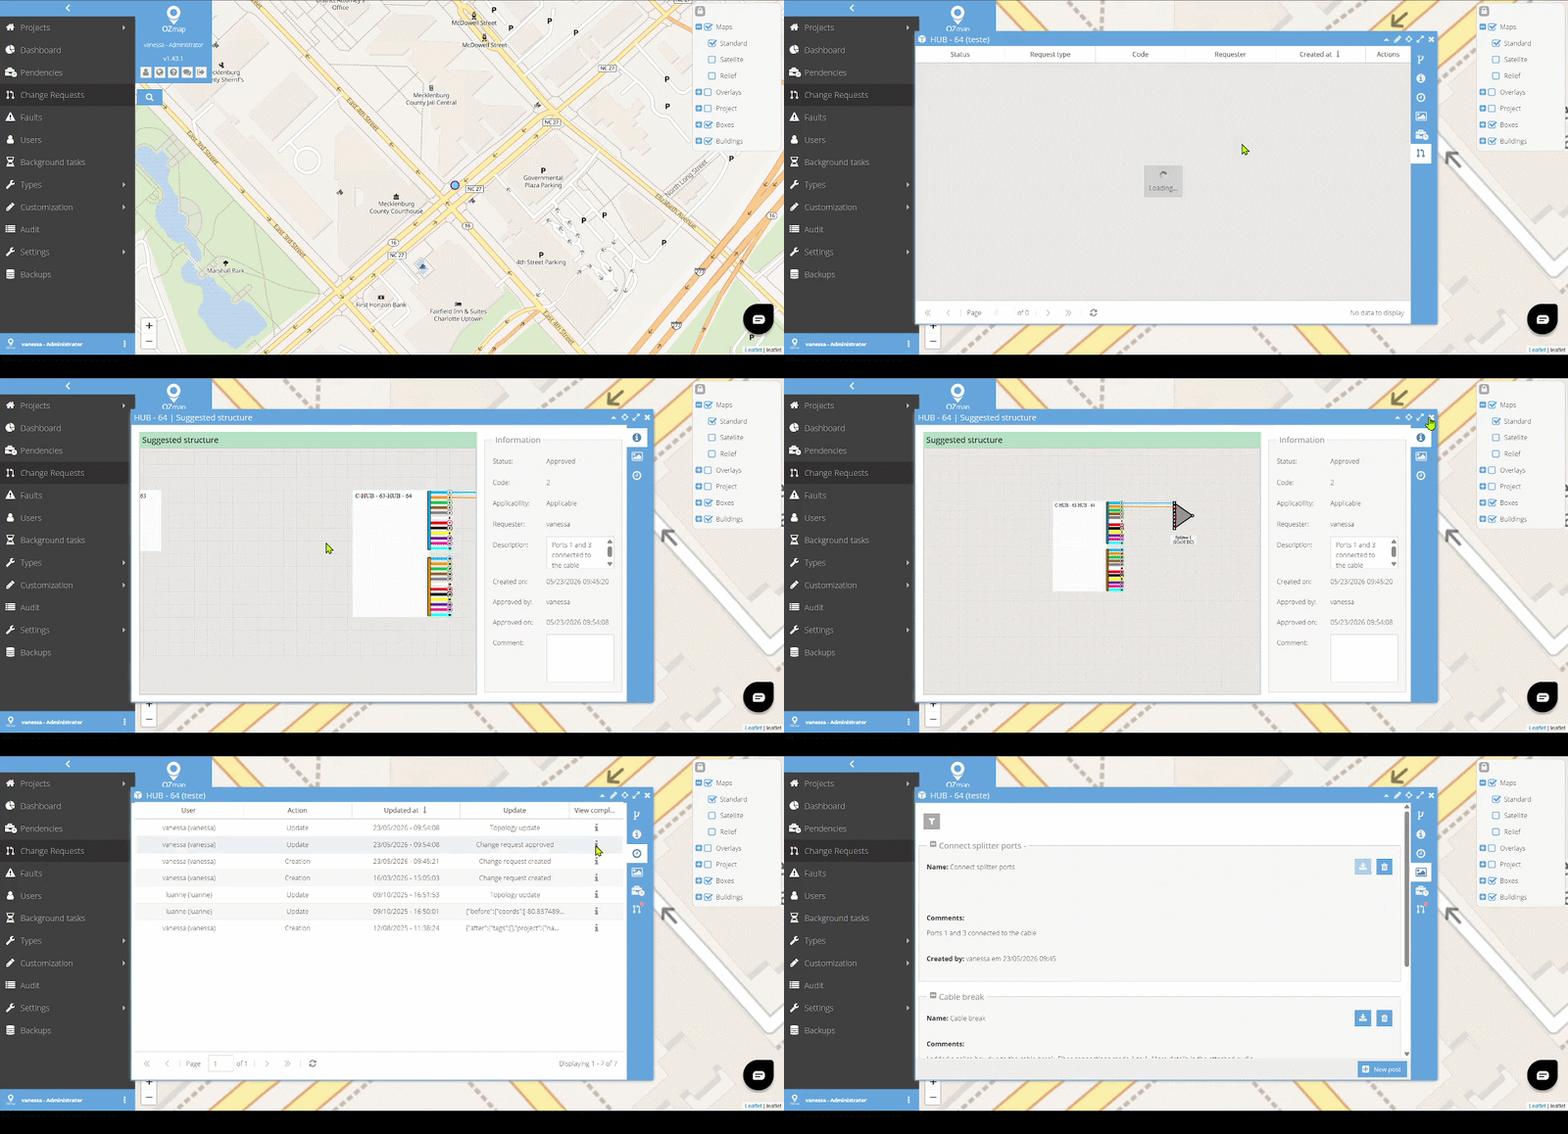
If approved, the request will be saved in the specific changes section of the box. In addition, the change will also be recorded in the box’s history, and the post created will be automatically saved in the Posts section.
Enabling Permission (Field)
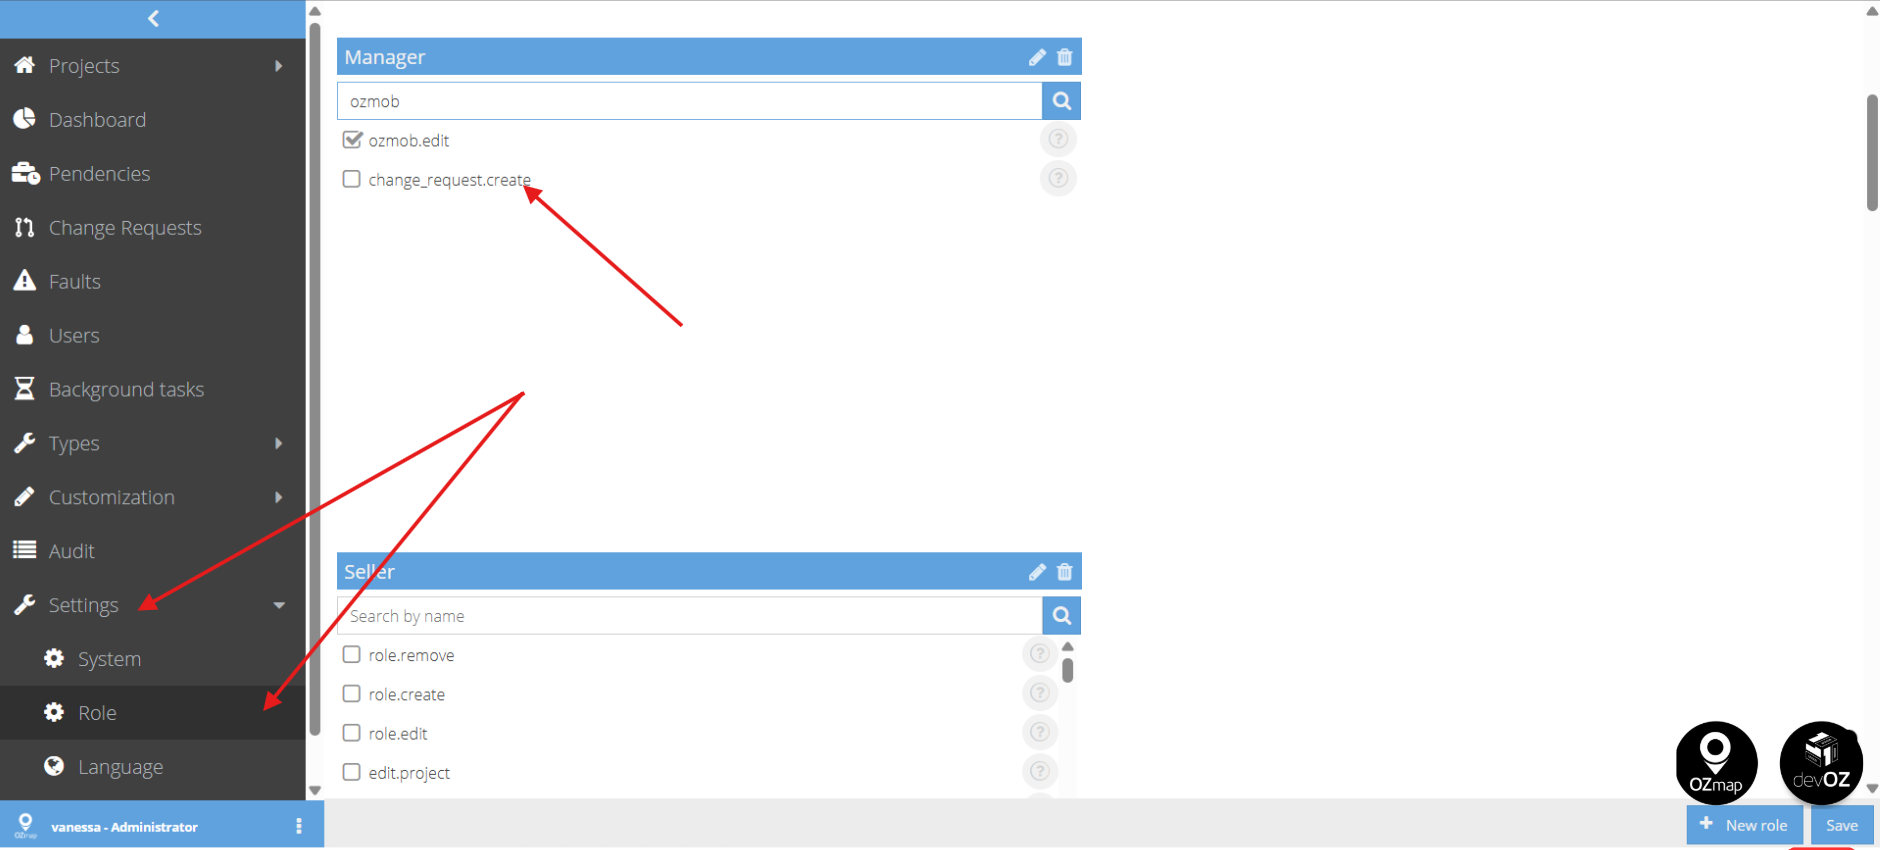
For field technicians to have access to this feature, it must be enabled in the role settings. To do this, go to Settings > Role, search for “OZmob”, enable the “change.request.creat” permission, and click Save.
Interested?
It’s simple! Just open a ticket with our Support team letting them know you’d like to learn more about the module. Then, include your contact details (email, phone number) in the message and leave the rest to us!